One brief.
Five finished outputs.
Enter a development's facts once, and the builder uses them across a print brochure, a microsite, a flip-through viewer, an interactive site plan, and a design brief for your team. Nine short steps get you there. This guide shows the whole shape of that journey before you start, then walks each step in order.
How it works
One input, five outputs. You fill in the development's information once; the builder can turn that same brief into any or all of the following, on their own schedule.
Getting there is nine short steps:
Each step is detailed further down; jump to any of them from the sidebar. Nothing below is required reading before you begin, it's here for when you land on a step and want the fuller picture.
Before you start
The builder writes almost all of the copy for you, but it can't invent imagery or facts it was never given. Having these ready before you sit down saves the most time, though nothing below stops you from starting today and filling gaps in later.
- The development's name, address, price range, tenure and total home count.
- How many distinct house types you're marketing, and their beds, bathrooms, floor area and price.
- Hero and cover CGIs for the development itself, separate from any per-plot imagery.
- Per house type: marketing images (CGIs or photos) and, separately, the architectural floor plan drawings. The builder reads specs directly off the floor plans, so it's worth uploading those even if you plan to type the room sizes by hand.
- Developer and agent logos, plus the agent's contact details and viewing hours.
- A site plan drawing showing every plot number, if you want the printed site-plan page or the interactive site plan.
- An existing brand palette and fonts. Skip this and the builder can propose three AI-generated options instead.
- Your own lifestyle and local-area photos. The builder searches for suitable ones automatically once you've entered an address.
- A specification document (materials, fittings, energy details). Skip it and either write the six categories by hand or leave the specification page out entirely.
I have this file, where does it go?
Where each common file gets uploaded, and what it's actually used for. Worth bookmarking if you're gathering assets from a few different people.
| File | Where it goes | What it's used for |
|---|---|---|
| Hero / cover CGI | Step 5, Media & assets | Brochure cover and the microsite's hero image |
| Street scene / aerial photo | Step 5, Media & assets | Site and location pages |
| Site plan drawing | Step 5, Media & assets | The brochure's site-plan page, and the background of the interactive site plan |
| Specification document | Step 5, Media & assets | Fills the six specification-page categories |
| House type marketing images | Step 4, Homes & plots | Printed exterior/interior photos on that house type's pages |
| Architectural floor plan (2D drawing) | Step 4, Homes & plots | Room dimensions and specs. The AI reads it; it is not itself printed |
| Marketing floor plan | Step 4, Homes & plots | The styled floor plan image that actually prints in the brochure |
| Local lifestyle / area photos | Step 3, Local imagery | Lifestyle pages and the location strip (or found automatically from your address) |
| Developer logo | Step 7, Branding | Back-cover developer credit, and the cover if no development logo is uploaded |
| Development logo | Step 7, Branding | Brochure cover and back cover |
| Agent / agency logo | Step 6, Agent & CTA | Microsite and design brief only; the brochure prints agent details as text |
Signing in, saving and drafts
You'll be given a work email and password. There's no self-serve password reset inside the app; if you're locked out, ask whoever administers the platform for you to reset it.
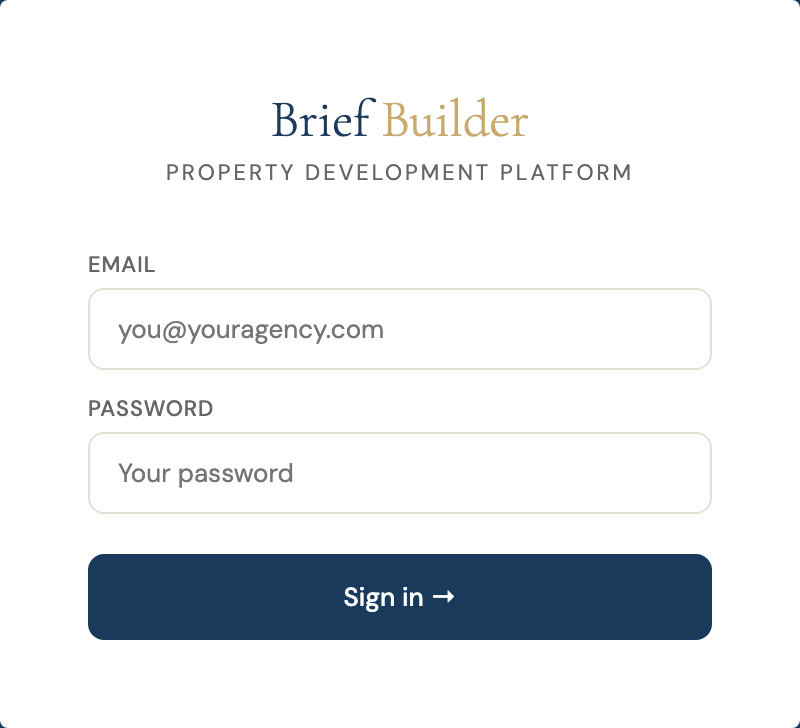
Once you're in, a Save draft button sits in the sidebar the whole time. Nothing saves on its own, so click it before you close the tab, and again after any big change. Discard draft clears the current one and starts fresh, and can't be undone.
If you already have saved drafts, a bar listing them appears across the top when you sign in, with a Resume button for each. Closing that bar doesn't lose anything: a Drafts button reopens the same list whenever you want it, so you can carry on with a draft you skipped past earlier. It also rechecks the server each time, so a draft you saved on another machine shows up without signing out and back in. On a full-width screen it sits in the sidebar; on a phone or narrow window, where the sidebar is hidden, the same button floats at the top of the screen instead.
How the AI copy fields work
Most text fields in the builder can be written for you. It works the same way on every field, so it's worth understanding once rather than re-learning it at each step.
- A field with a ✦ AI badge can be generated. Fill in the plain facts around it first: the more the AI has to work from, the less generic the result.
- Click ✦ Generate to write or rewrite that one field. There's no single "generate everything" button, each field is its own click, so you can regenerate just the one that didn't come out right.
- Editing a generated field by hand makes it yours. It won't be silently overwritten later: clicking Generate on a hand-edited field asks you to confirm first.
- If a fact the copy was based on changes afterwards (say, you edit the price after generating the description), that field is flagged as stale with a note on what changed. Regenerate to catch up, or dismiss the flag and keep what's there.
- Generating costs money on our side, so it needs you to be signed in and there is a fair-use limit of a few hundred generations an hour per sign-in. A normal build, including regenerating fields you aren't happy with, stays well under it. If you do hit it the field tells you so and the limit clears within the hour.
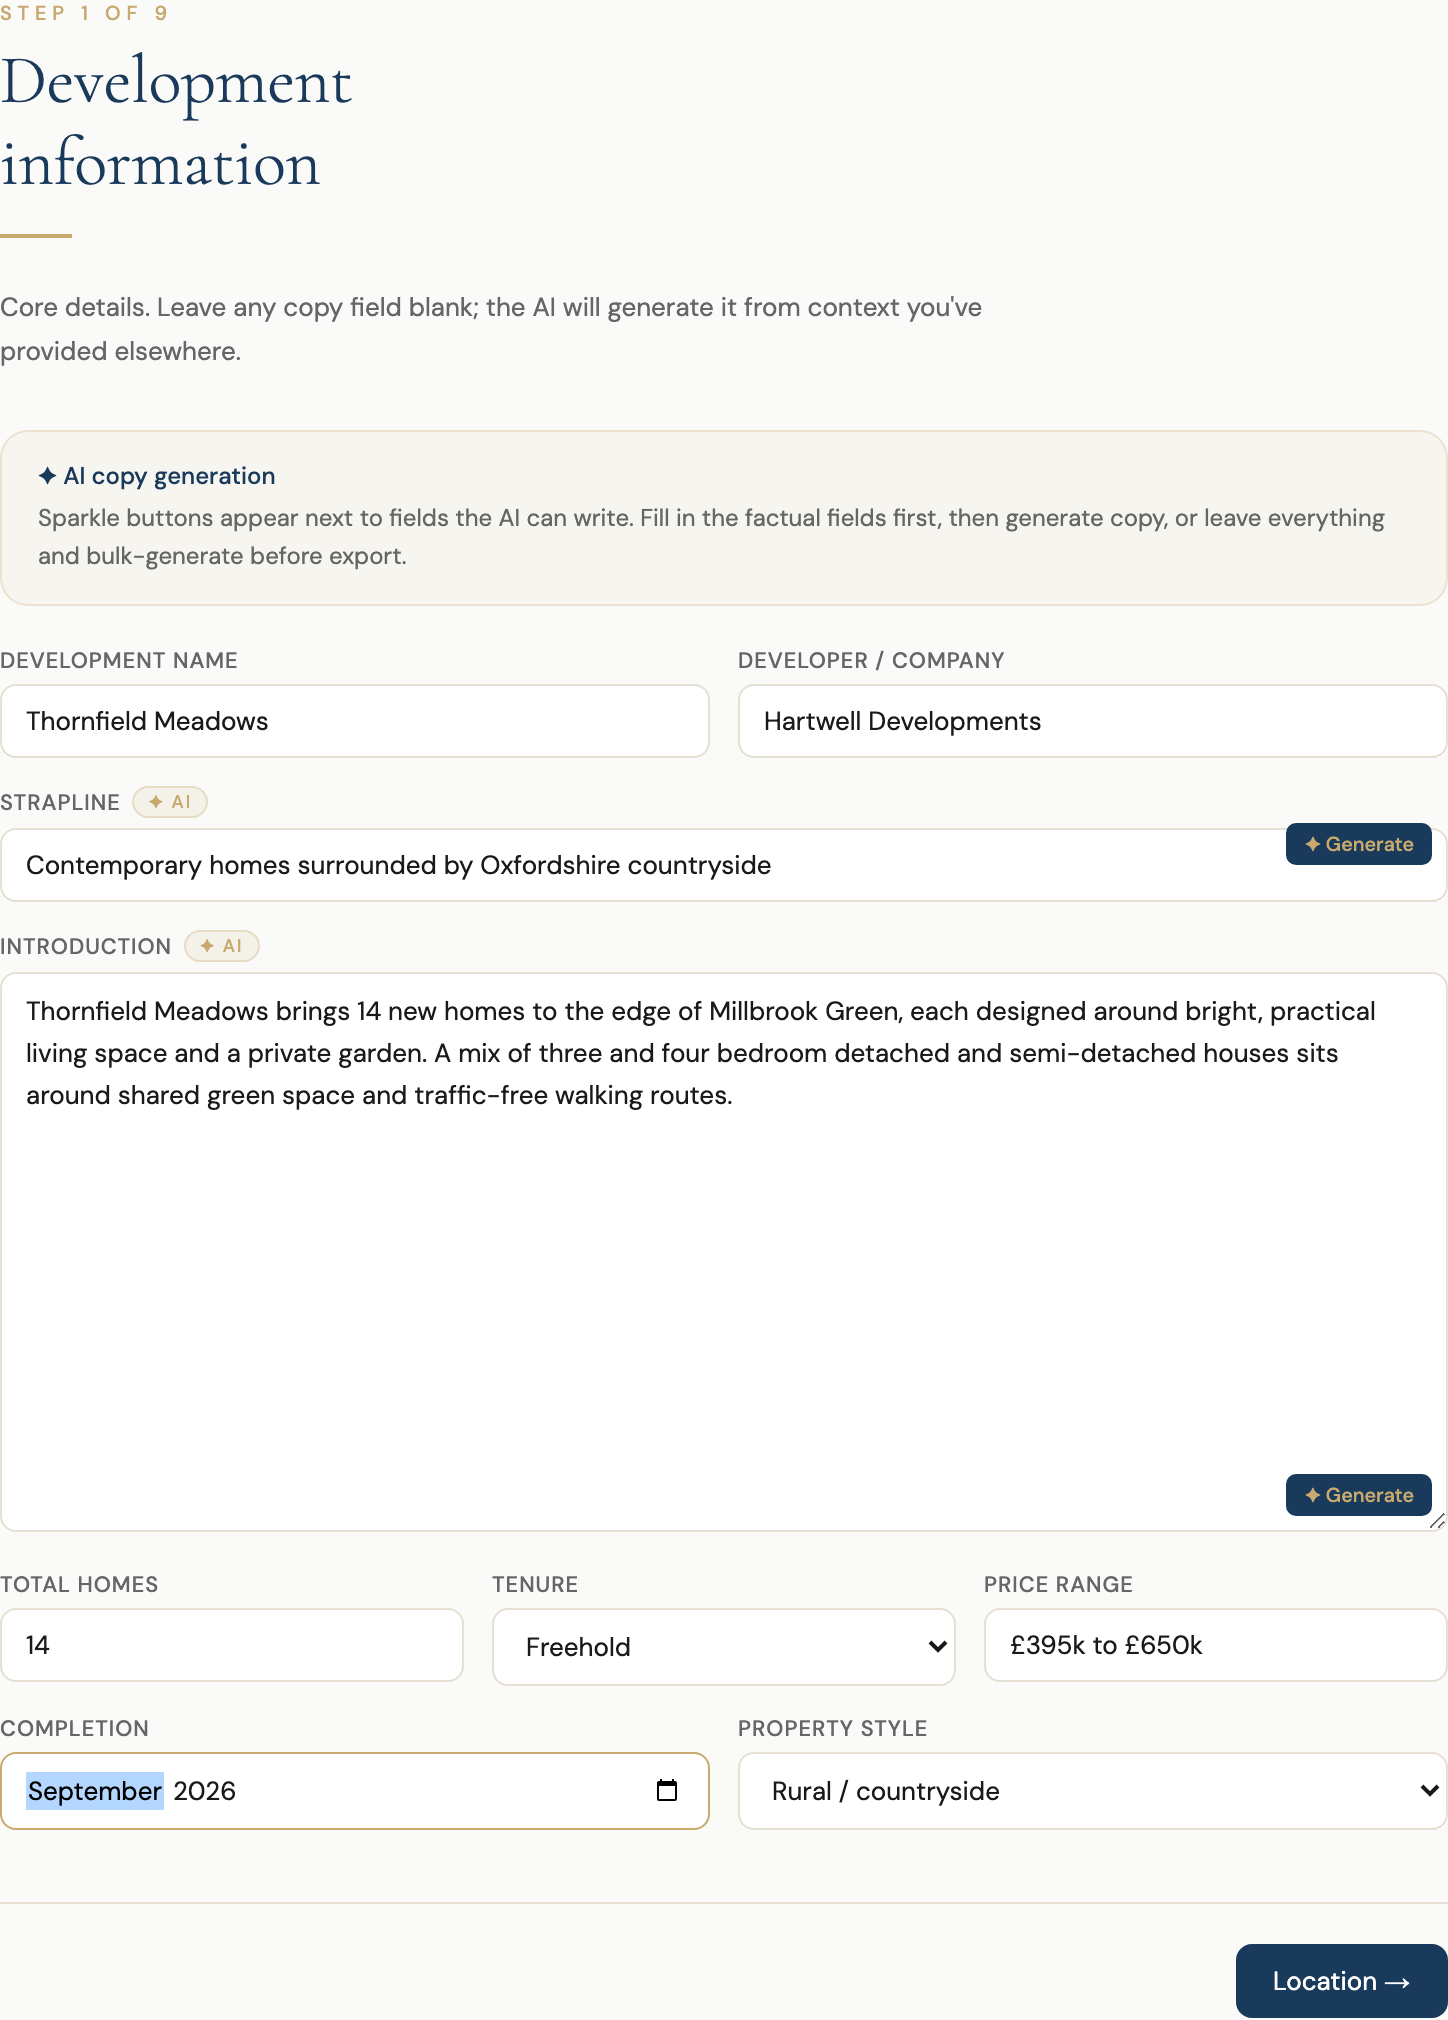
Development information
Entering the core facts that almost everything else in the builder is built on.
- Development name, developer, total homes, tenure, price range and target completion.
- Fill in Development name, Developer / company, Total homes, Tenure, Price range, Completion and Property style.
- Leave Strapline and Introduction blank for now, or write your own.
Generates a strapline and an introduction paragraph from the facts above, once you ask it to. Get these facts right first, since they feed almost everything generated later.
Location & amenities
Entering the address so the builder can find what's nearby.
- The development's address, UK postcode or Irish Eircode.
- Enter the address, UK postcode or Irish Eircode.
- Click Auto-fill to pull in the nearest town, station, commute time, amenities and schools.
- Fix or remove anything the lookup got wrong.
Looks up nearby transport, towns, schools and amenities from the address, and can write the location paragraph from them once you ask it to.
Local imagery
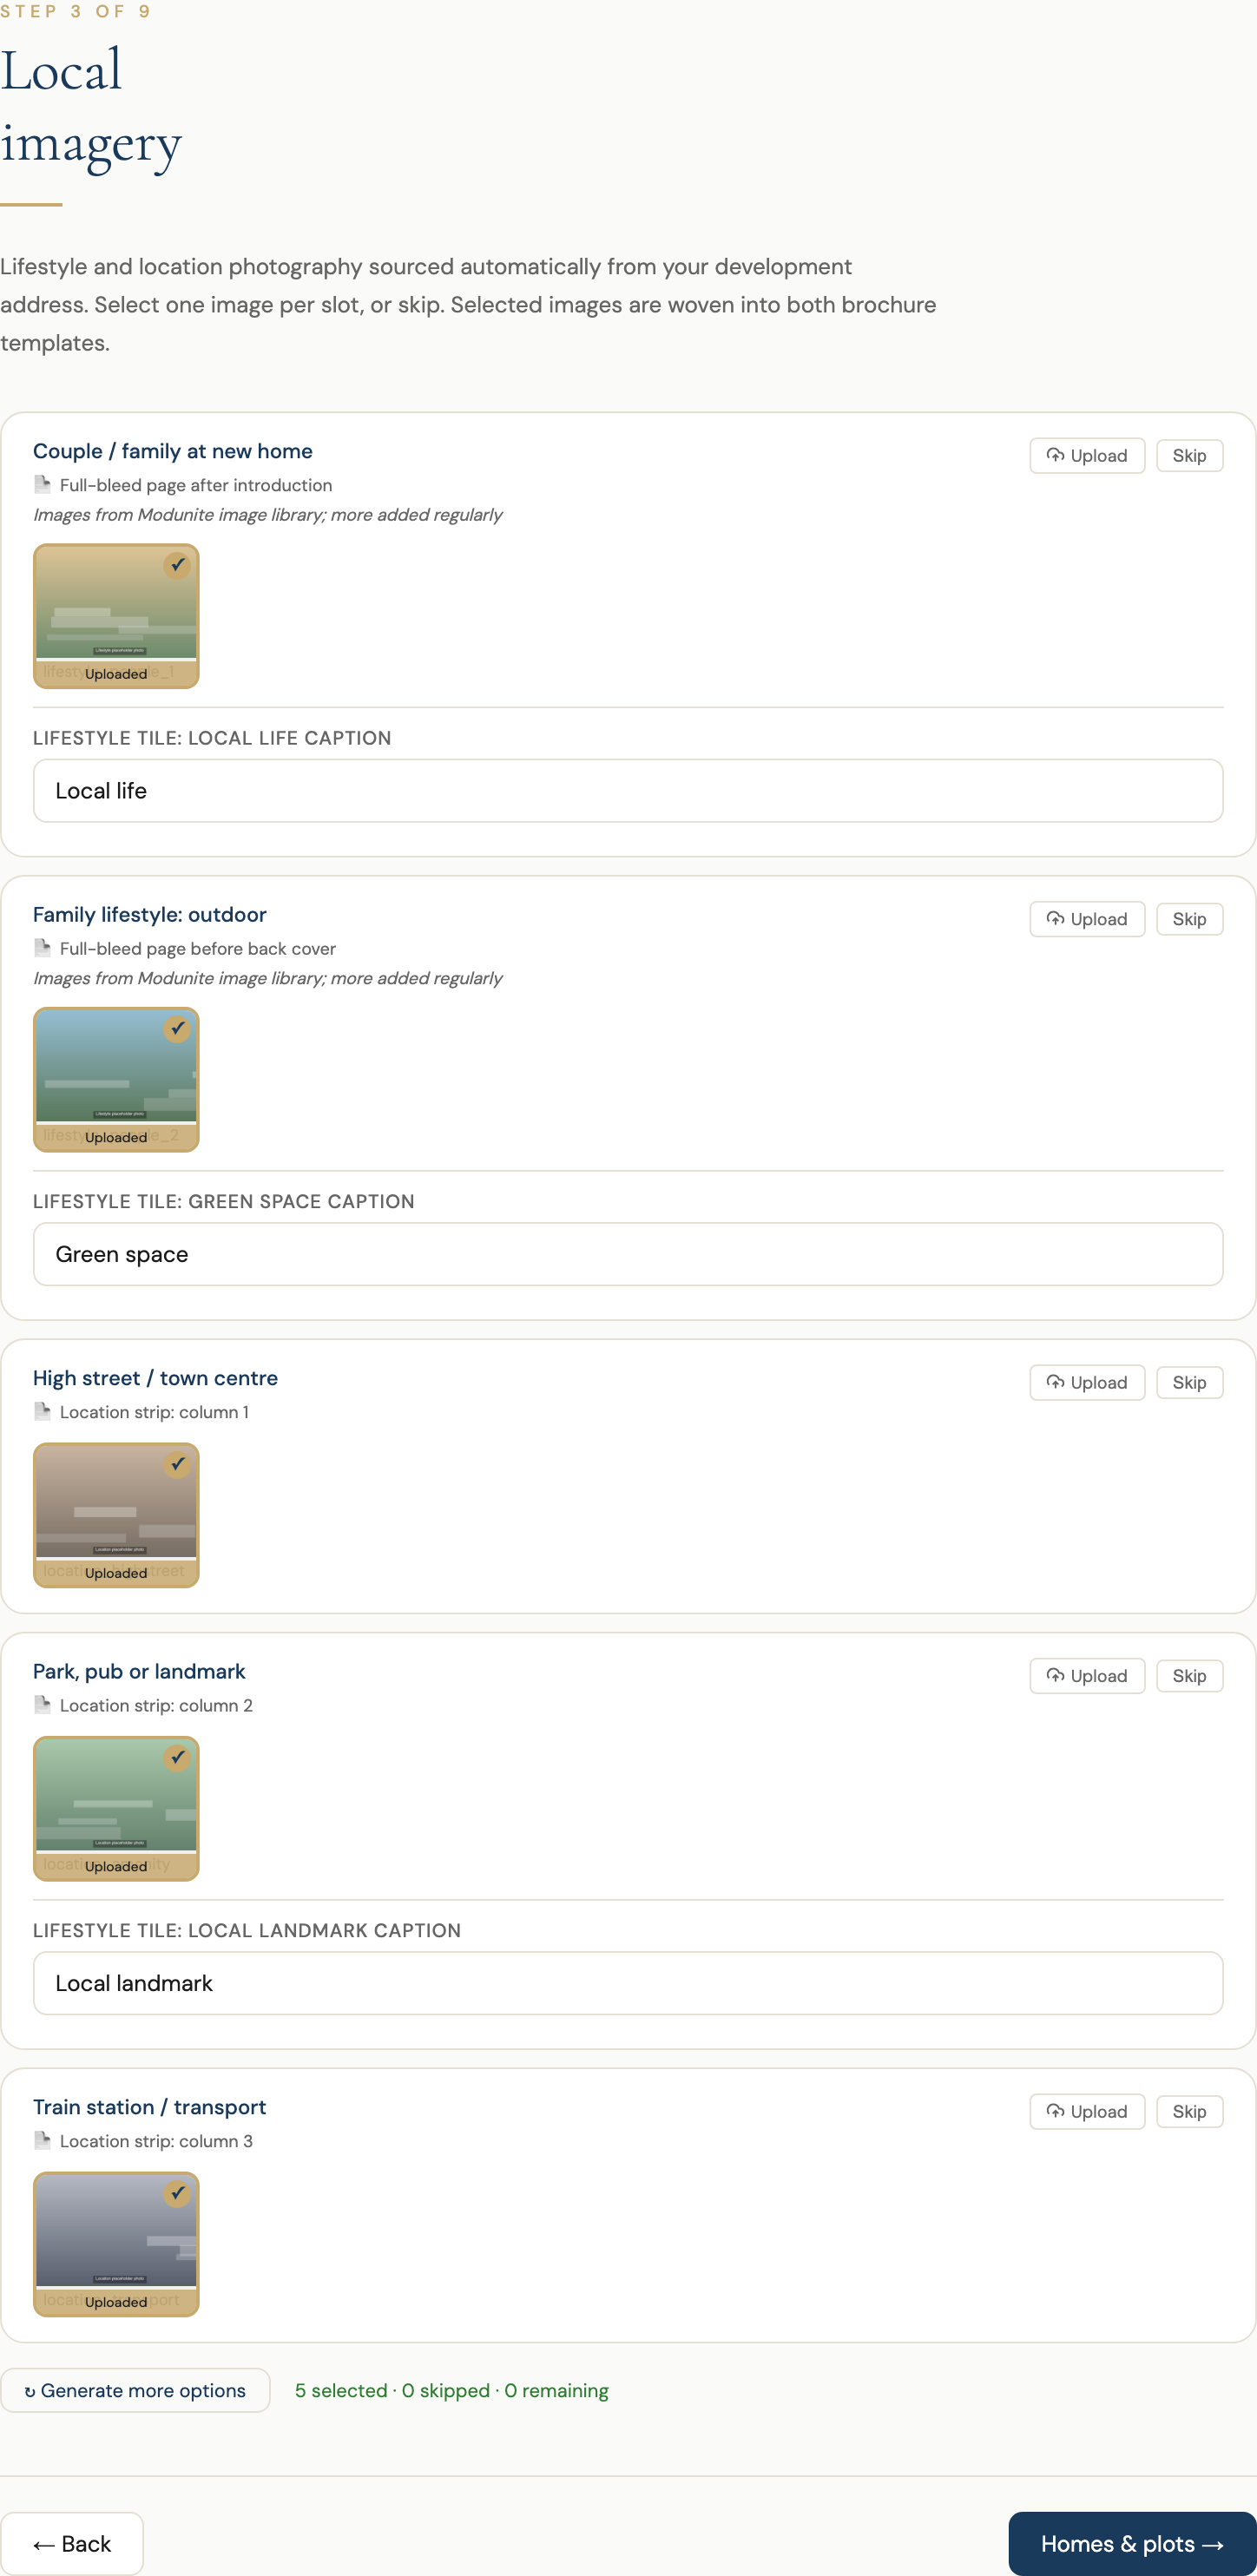
Choosing the lifestyle and local-area photos that appear in the brochure, five slots in total.
Nothing you have to supply. The builder searches for photo options automatically once Step 2's address is filled in; your own photos are only needed if you'd rather replace what it finds.
- Review the photo options offered for each of the five slots.
- Pick one per slot, or click Skip.
- Prefer your own photo instead? Use the Upload button on that row, no auto-sourcing required.
Searches for suitable local photos based on your address: two lifestyle shots (couple / family at new home, family lifestyle: outdoor) for the full-bleed pages either side of the brochure, and three location shots (high street, park, pub or landmark, train station) for the location strip. Captions on the two lifestyle photos are plain editable text, not AI-generated.
Homes & plots
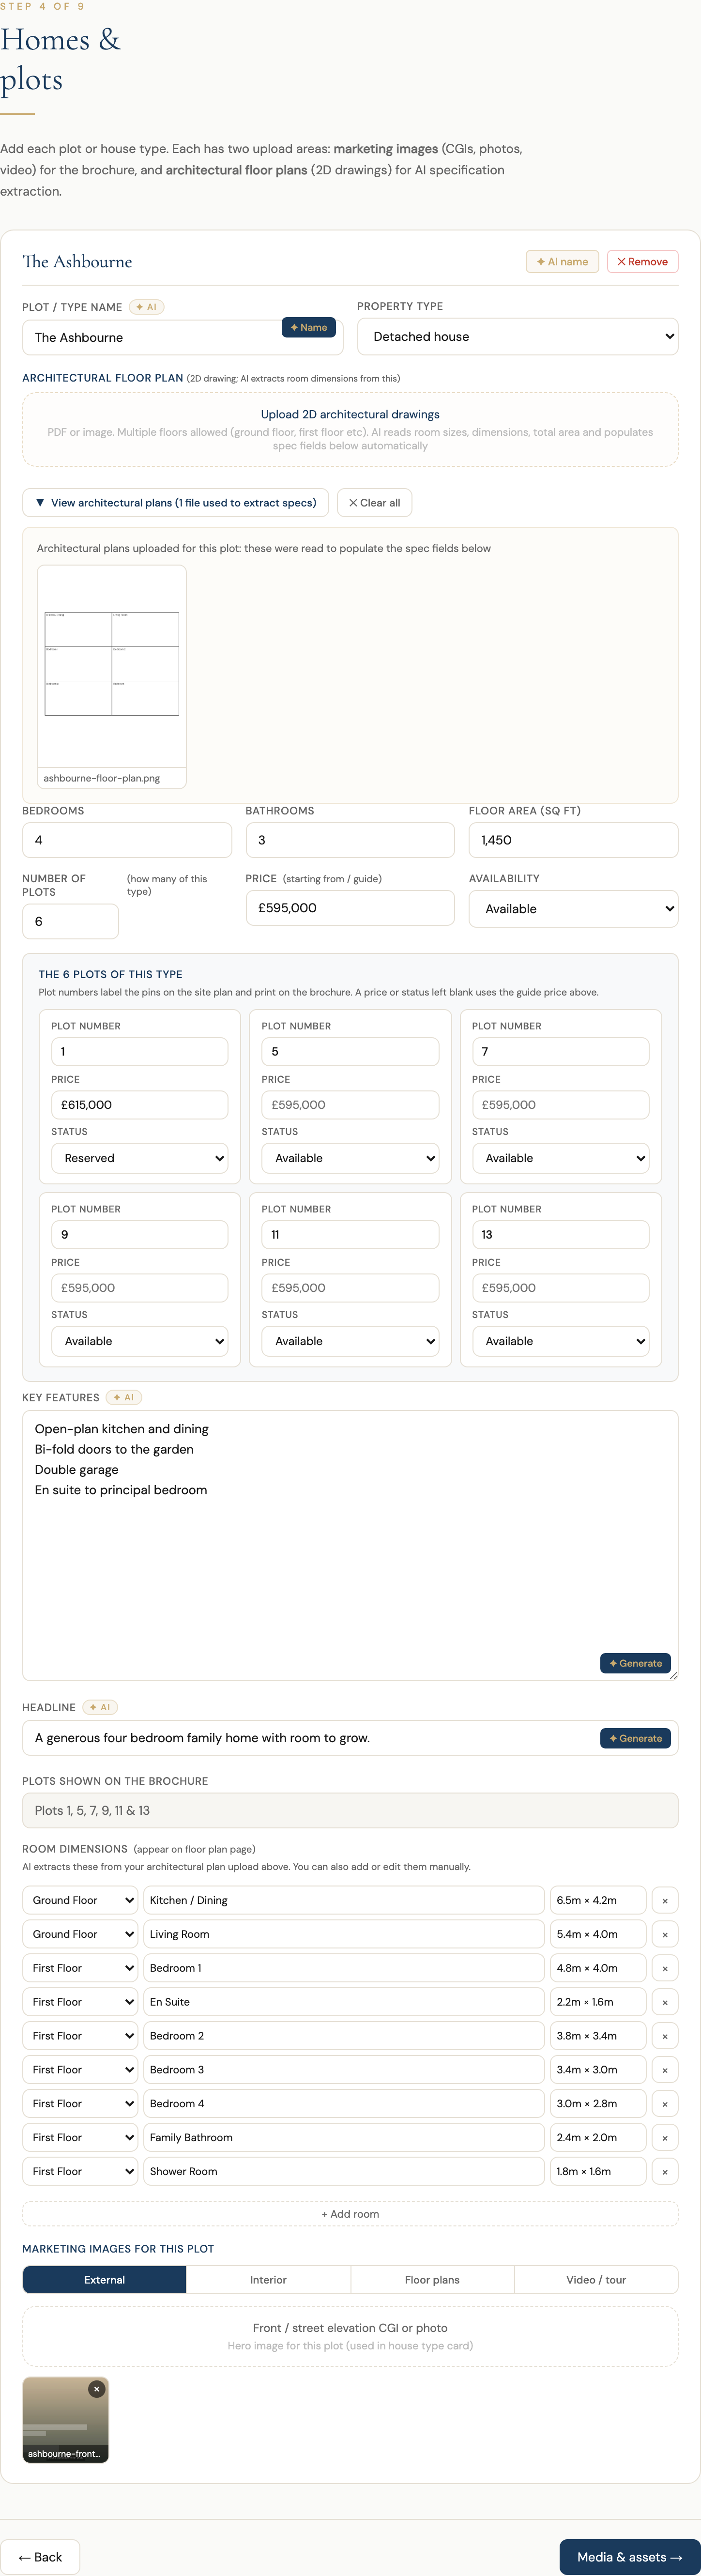
Adding every house type you're selling, with its specs, images and individual plot numbers.
- For each house type: beds, bathrooms, floor area, price, and how many plots of this type.
- Its architectural floor plan and marketing images Recommended, see What the builder does for you below.
- Click "Add plot / house type" once for each distinct house type.
- Upload its architectural floor plan (the plain 2D drawing) and check the specs it reads off.
- Separately, upload its marketing images (CGIs or photos) under Marketing images for this plot.
- Fill in or correct beds, bathrooms, floor area and price.
- In the per-plot grid below that, overwrite a row's plot number with the real one from the site drawing wherever it differs, and fill in a price or status only where that specific plot needs to differ from the guide price above.
Reads room names and dimensions straight off an uploaded floor plan and fills in floor area and the room list for you, ready to review before you move on. Beds and bathrooms come from that room list itself rather than a number reported separately, and only once it actually contains one, a ground floor plan alone typically shows no bedrooms, so the counts stay blank rather than guessing until the floor with the bedrooms is uploaded too. A spec you've edited by hand is never overwritten by a later upload, and every row in the per-plot grid gets a number automatically, unique across the whole development.
Media & assets
The biggest step in the builder, so it's split into four parts below: development-wide media, the brochure's page copy, the specification page, and the interactive site plan. Plot-specific images belong in Step 4, not here.
5A. Development media
- Hero / cover CGIs Recommended
- Street scenes & aerials Recommended
- A site plan drawing showing every plot number, landscape (wider than tall) Recommended
Puts each image where it belongs automatically: hero / cover CGIs on the brochure cover and microsite hero, street scenes and aerials on the site and location pages, and the site plan on both the printed site-plan page and the interactive site plan's background.
A landscape drawing is shown at its full size everywhere: across both pages of the double-page brochure and the flip-through brochure, and across the width of the portrait brochure. A tall drawing still works but sits smaller, with empty bands either side. On the double-page brochure the drawing runs across the fold, so printed one sheet at a time it is cut at the centre.
5B. Brochure page copy
Nothing. Every heading and paragraph for the overview, site plan, location, lifestyle and connections pages arrives pre-filled with working example text.
- Read through the pre-filled copy for each page.
- Edit anything by hand, or click ✦ Generate to rewrite it from your development's facts.
5C. Specification page
Filling in the six specification categories: construction and insulation, heating and energy, kitchen and utility, bathrooms, floor coverings, and finishing touches. Untick "Include the specification page" to leave it out altogether.
- Upload a specification document (PDF or image) and let the builder fill all six categories from it, or
- Type each category by hand, or generate it with ✦.
Rewrites whatever a spec document says into the brochure's own voice rather than copying it word for word, and reports how many categories each uploaded file filled. Categories still holding the default example text are replaced without asking; anything you've edited by hand is listed by name and left alone unless you confirm.
5D. Interactive site plan Optional
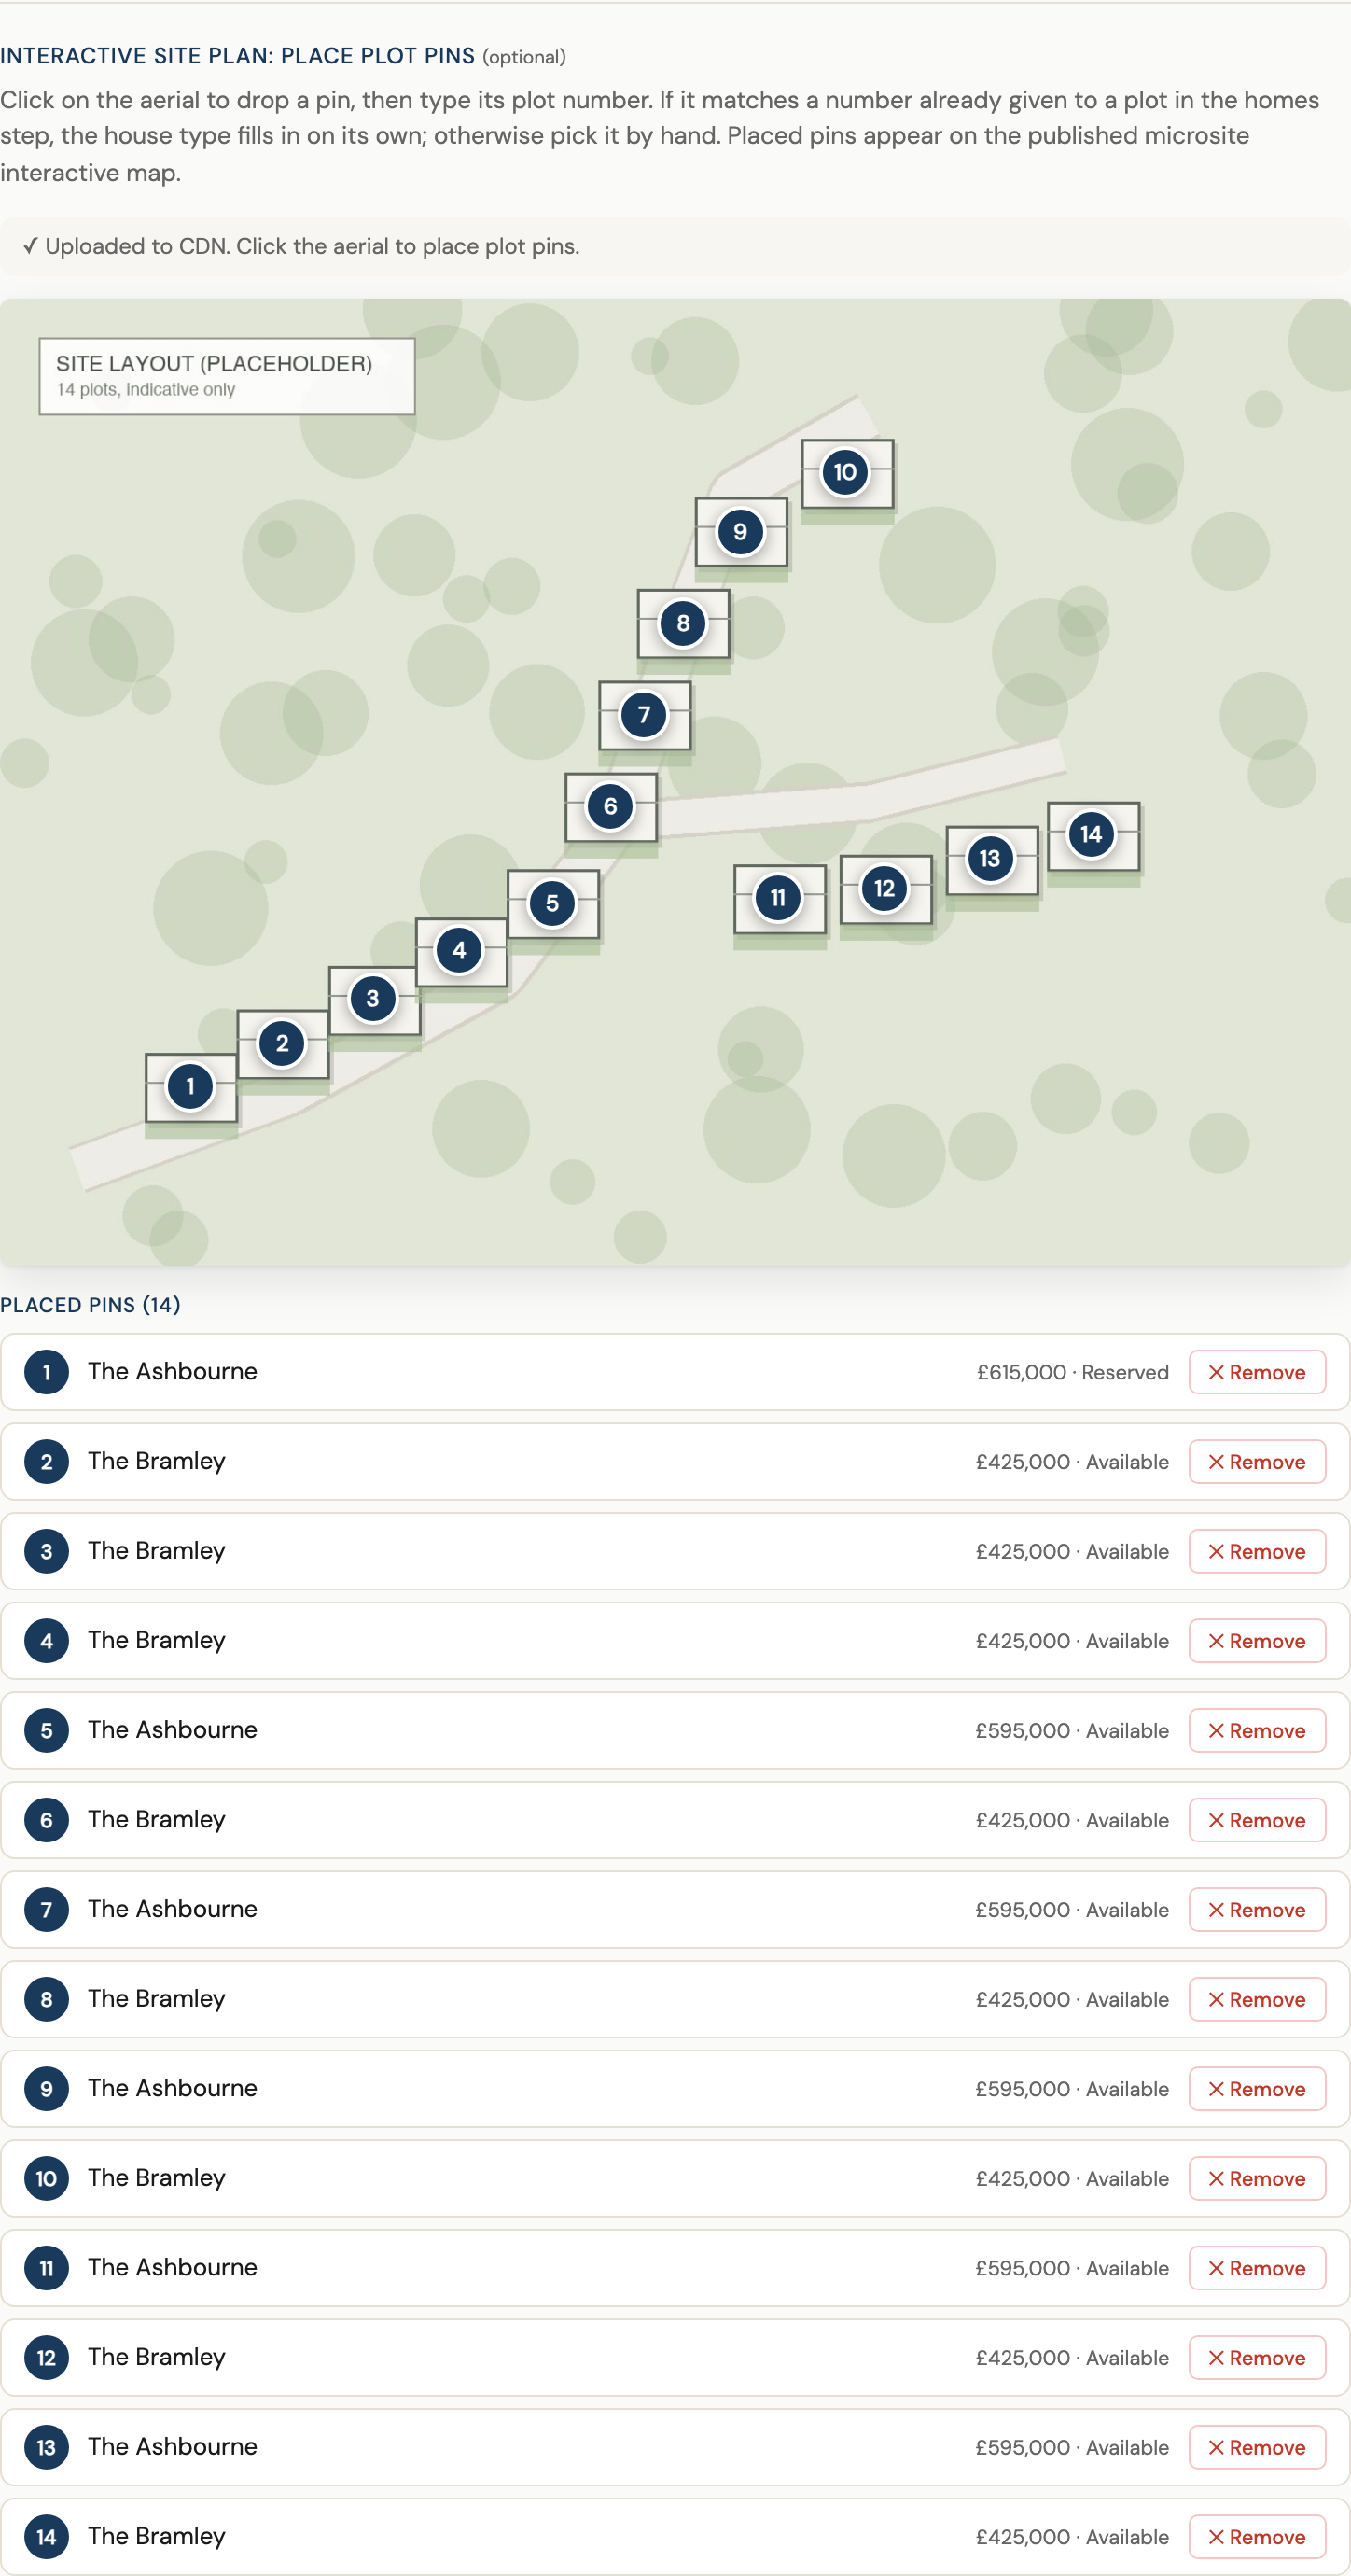
Placing a numbered pin on the site plan for every physical plot, so the published plan is clickable. Worth the time on anything more than a few plots.
- Every house type already added in Step 4, with Number of plots set to match the real site.
- The site plan image uploaded above, and finished uploading before you place any pins.
Below the guide price on each house type card sits a grid with one row per physical plot. This is what actually drives a pin's colour, its quick-view popup, and its row in the dashboard, so it's worth filling in rather than leaving on its defaults.
- Each row gets a plot number automatically, unique across the whole development. Overwrite it with the real number from the site drawing wherever it differs.
- A row's price and status, once filled in, take over from the house type's shared guide price and Availability dropdown for that one plot. Leave a row blank and it just uses the house type's defaults.
- Two rows can't share a number: a clash is flagged immediately and withheld from pin placement until it's fixed.
- The brochure's plot caption ("Plots 1, 5, 7…") is built from these numbers automatically, nothing left to type by hand.
- Click the plan where a plot sits and type that plot's number.
- If it matches a number already given to a plot in Step 4, the house type fills in on its own. Only an unrecognised number asks you to pick the house type by hand.
- Repeat for every physical plot, not once per house type: a fourteen-home site gets fourteen pins even with only two house types between them.
- Publish from Step 9, under Live & embeddable.
5E. Video, tour & map links Optional
- Development video URL, a whole-development flythrough or promo video.
- Virtual tour URL, a whole-site Matterport, Kuula (or similar) tour. For Kuula, use a "share" link (it contains /share/); the tour provider's own home page cannot be shown inside another page.
- Welcome video, landscape (16:9) and portrait (9:16), two versions of the same welcome film. A Cloudflare Stream watch link or a YouTube or Vimeo embed link works for either.
- Google Maps embed URL, for the location page's map.
- The microsite's hero, as a full-bleed autoplaying background behind the heading, on desktop. On a phone screen it shows as a smaller embedded player instead of a background, since a muted autoplaying background is easy to miss on a small screen and heavier to load on mobile data.
- The flip-through brochure's opening spread, across both pages, behind the heading, quote and figures, playing muted the moment a reader turns to it (see "How video and tours play inside the flip-through brochure" below). Since text sits on top of it, use background footage with no titles or captions of its own for this field; a video with its own titles belongs in the welcome video fields instead.
- It does not appear in the printed portrait or spread PDF: those are static, so this field has nothing to render there.
- The online brochure (microsite), as a "Welcome" section below the introduction, using the landscape version. It starts by itself, with sound, as soon as a visitor scrolls to it, and pauses when they scroll away. A browser only allows sound that nobody asked for once the visitor has clicked or tapped something on the page, and scrolling does not count, so a first-time visitor who has only scrolled gets it muted instead, with a "Tap for sound" button in the corner. A Cloudflare Stream or direct video file is handled this way; a YouTube or Vimeo video always starts muted, and a tap on the same button turns the sound on.
- The flip-through brochure, as a spread of its own straight after the cover, using the landscape version across both pages with nothing laid over it, so the film's own titles stay readable. It is shown whole, never cropped, with plain bands above and below if the film is a different shape from the spread, and the centre fold shows over it like the other spreads. It starts with sound the moment a reader turns to it, and the video's own controls (play, volume, full screen) are on it. A page turned to by clicking a button or pressing a key counts as the reader having interacted, so sound is normally allowed; if a browser still refuses, the video's own play button is there to press. The bands above and below the film still turn the page; clicking the film itself does not.
- On a phone the flip-through brochure shows one page at a time, and the welcome is a single page there, using the portrait version, or the landscape one if there is no portrait version. The welcome spread needs the landscape version: a portrait version on its own does not add one.
- The printed brochure is unchanged and has no welcome page.
- The online brochure, as an "Explore in 360" section after the site plan.
- The flip-through brochure's site spread, as its own scan-or-click code.
- The fallback QR code on any house type's brochure page (and the back cover) that has no video or tour of its own, see "Where the brochure's QR codes point" below.
Agent & call to action
Adding the selling agent's details and the call to action that closes the brochure and microsite.
- Agency name, contact name, phone, email, website, show home address, viewing hours and a booking link.
- Agent / agency logo Optional, used on the microsite and design brief only.
- Fill in the agency and contact fields above.
- Leave CTA headline and body blank, or write your own.
- Leave the plot disclaimer blank to use a standard one, or paste your own legal wording.
Generates the CTA headline and body copy from the fields above, once you ask it to. The disclaimer prints on every plot page.
Branding
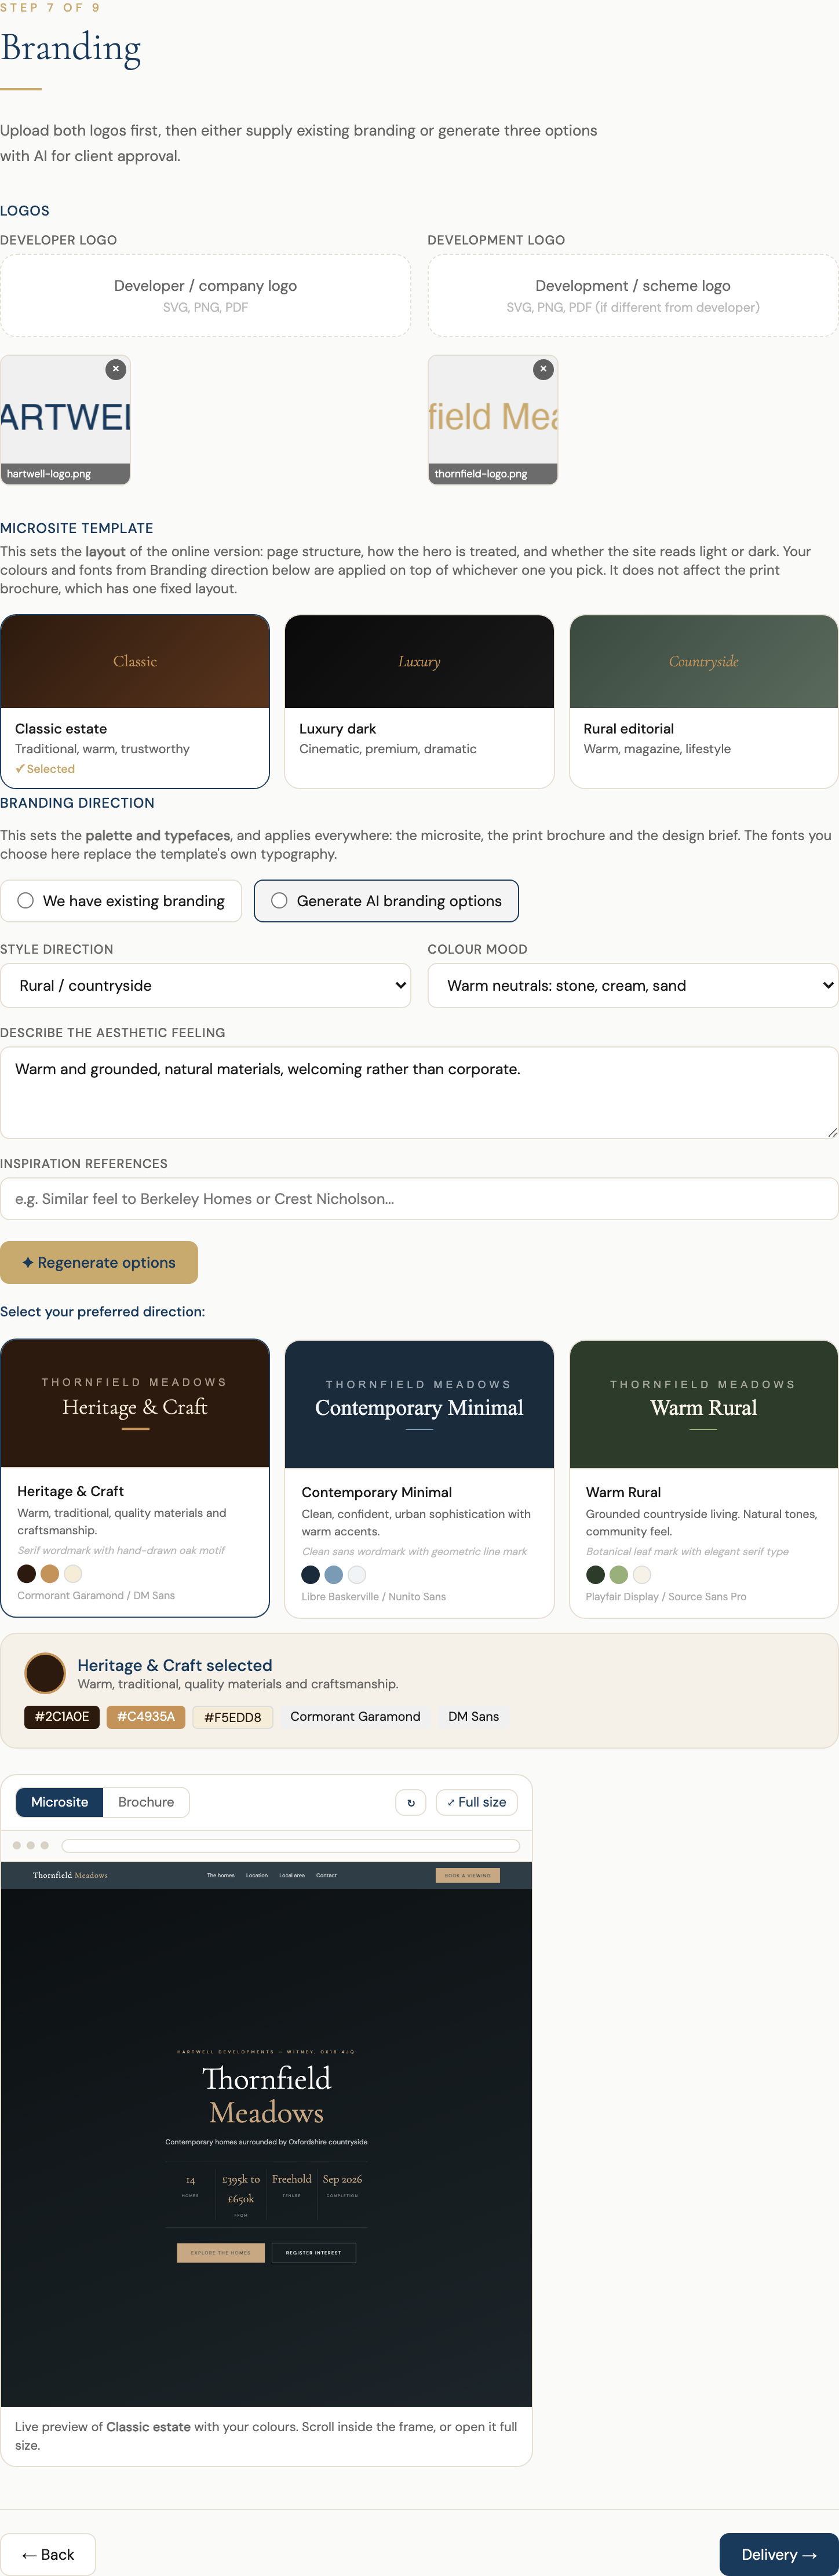
Setting the microsite's layout and choosing the colours and fonts used across the microsite, brochure and design brief.
- Developer logo and development logo Recommended, the development logo is skippable if it's the same as the developer's.
- Either an existing palette and fonts, or a style direction to generate from Optional, generating is the default if you have neither.
- Upload both logos.
- Pick a microsite template: Classic, Luxury or Countryside. This is layout only (page structure, light or dark), and never changes the print brochure, which has one fixed layout.
- Choose "We have existing branding" and enter your colours and fonts, or choose "Generate AI branding options", answer the style prompts, and pick your favourite of the three results.
- Check your choice in the live preview panel on the right, switching between Microsite and Brochure.
If you generate, proposes three complete colour and font directions to compare side by side rather than one guess to accept or reject, applied instantly to the live preview so you can see it before committing.
Delivery & notifications
Deciding who receives the finished files by email.
At least one recipient (name, email, role) if you plan to email anything. Skip this entirely if you'll just download and share the files yourself.
- Add one or more recipients with name, email and role.
- Generate whatever outputs you want to send in Step 9.
- Come back here, tick which files to attach, and press Send to recipients.
Sends each recipient their own individual email, with only the files you ticked attached. Addresses are never shared between recipients.
Review & export
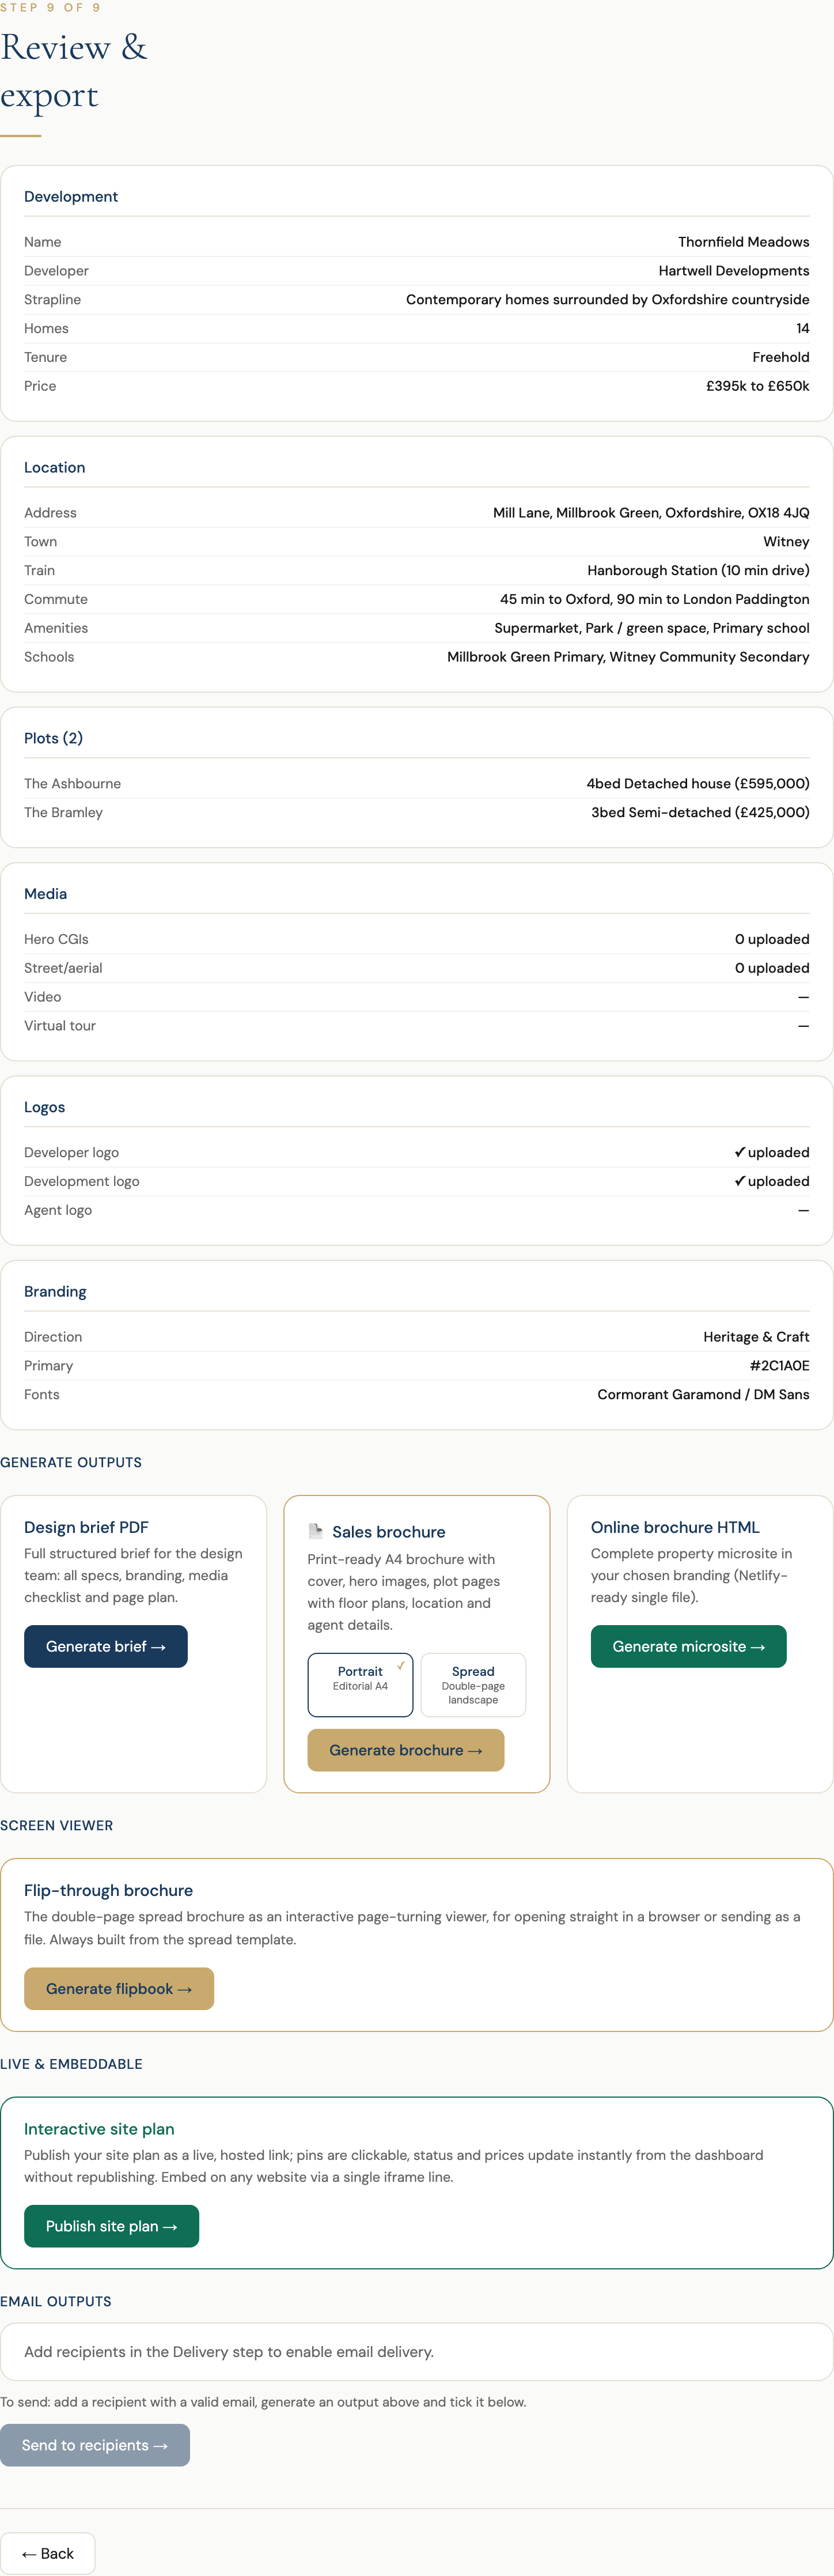
This is what the last eight steps were building towards. Everything you've entered is reviewed on one page, followed by every output your completed brief can produce. Each one is independent, generate only the ones you actually need, in any order.
Your links
Every address this development has, listed at the top of the step: the online brochure, the flip-through brochure, the interactive site plan and the dashboard, each with a Copy button, plus Copy embed on the site plan. The hosted ones appear once you've published them and stay there afterwards, so you can come back days later, open the draft, and read your link off this panel without generating anything again. The dashboard row is always listed, since its address exists from the moment a development does.
The panel reads from the saved record for the development you currently have open, so opening a different draft swaps the links to that one's. If a link you expect isn't listed, that output hasn't been published yet, generating it will add it.
Generate outputs
Design brief PDF
Full structured brief for the design team: all specs, branding, media checklist and page plan.
Sales brochure
Print-ready A4 brochure with cover, hero images, plot pages with floor plans, location and agent details. Choose Portrait (single-page editorial) or Spread (double-page landscape) before generating. Carries scannable QR codes: up to two per house type page (video flythrough, virtual show home tour) and one on the back cover.
Online brochure HTML
Complete property microsite in your chosen branding, ready to host on Netlify as a single file.
Screen viewer
Flip-through brochure
The double-page spread brochure as an interactive page-turning viewer, for opening straight in a browser or sending as a file. Always built from the Spread template regardless of which one is selected above. The welcome video and the development video play inline as you reach their page, the whole-site virtual tour and each house type's show home tour open over the page from their code, and each floor plan opens in a larger view you can zoom. House type flythrough videos are not in the flip-through brochure (they stay as a code in the printed brochure). See the notes below on where each one shows and what its own limits are.
Live & embeddable
Interactive site plan
Publishes as a live, hosted link. Pins are clickable, and plot status and prices update instantly from the dashboard, no republishing needed. Embed on any website with a single iframe line.
Before you generate
A last pass over the summary at the top of Step 9 before you click Generate on anything.
- Development facts, name, address, price, tenure, are correct.
- Every house type has the right beds, bathrooms, price and plot numbers.
- Floor plans are uploaded and their specs reviewed.
- Marketing images are uploaded for each house type.
- Local imagery is selected, or intentionally skipped.
- Agent details are correct.
- Logos are uploaded and branding is chosen.
- AI-generated copy has been read through, no stale flags left unresolved.
- Site plan pins are placed and match the real plot numbers, if you're using the interactive site plan.
Sharing, hosting and later edits
- The microsite and flipbook each get a real, public URL the moment you generate them, in a copyable link box right under their Generate button. Send that link directly, no separate hosting step.
- The site plan works differently: it stays live and editable. Update a plot's price, status or dashboard image from the dashboard and the published site plan picks it up immediately, nothing to re-export or re-send. The one exception is a plot popup's front elevation and floor plans, since those come from Step 4 in the wizard: changing an upload there needs a republish from Step 9 to reach the live plan.
- The dashboard is where day-to-day changes happen from here on: plot prices, availability and images can all be updated there without going back through the wizard.
Quick answers
If it says the hosting account is out of publishing credits, generating again will not help, since every attempt hits the same block: an administrator needs to add credits, or move this site to a hosting account that has them.
If the message asks you to sign in as an owner of the development, your session has expired or the development is not on your account: sign in again and re-export, or ask an administrator to publish it.
For any other reason, try generating again first. If it keeps failing, the download can be uploaded to Netlify by hand. For the microsite, the error also includes a dashboard link you can use in the meantime.
"Invalid email or password" means the details didn't match an account. Double-check the email and password, then ask whoever administers the platform to reset it for you. There's no self-serve reset in the app.
"Sign-in is unavailable right now because account storage can't be reached" means the problem is on the platform's side, not yours: your password hasn't changed and nothing has been lost. Don't reset your password. Try again in a few minutes, and if it keeps happening, tell whoever administers the platform, since everyone will be seeing the same thing.